Models
Choose which models appear in your client and set your defaults.
Models define what the agent can use. You can add, edit, and remove models. Set a default model, sync with the community list, or define custom models for any provider.
The models tab
Open Configuration from the three dots menu and select the Models tab. You will see your model list. The first model with a default tag is used unless a preconfig overrides it.
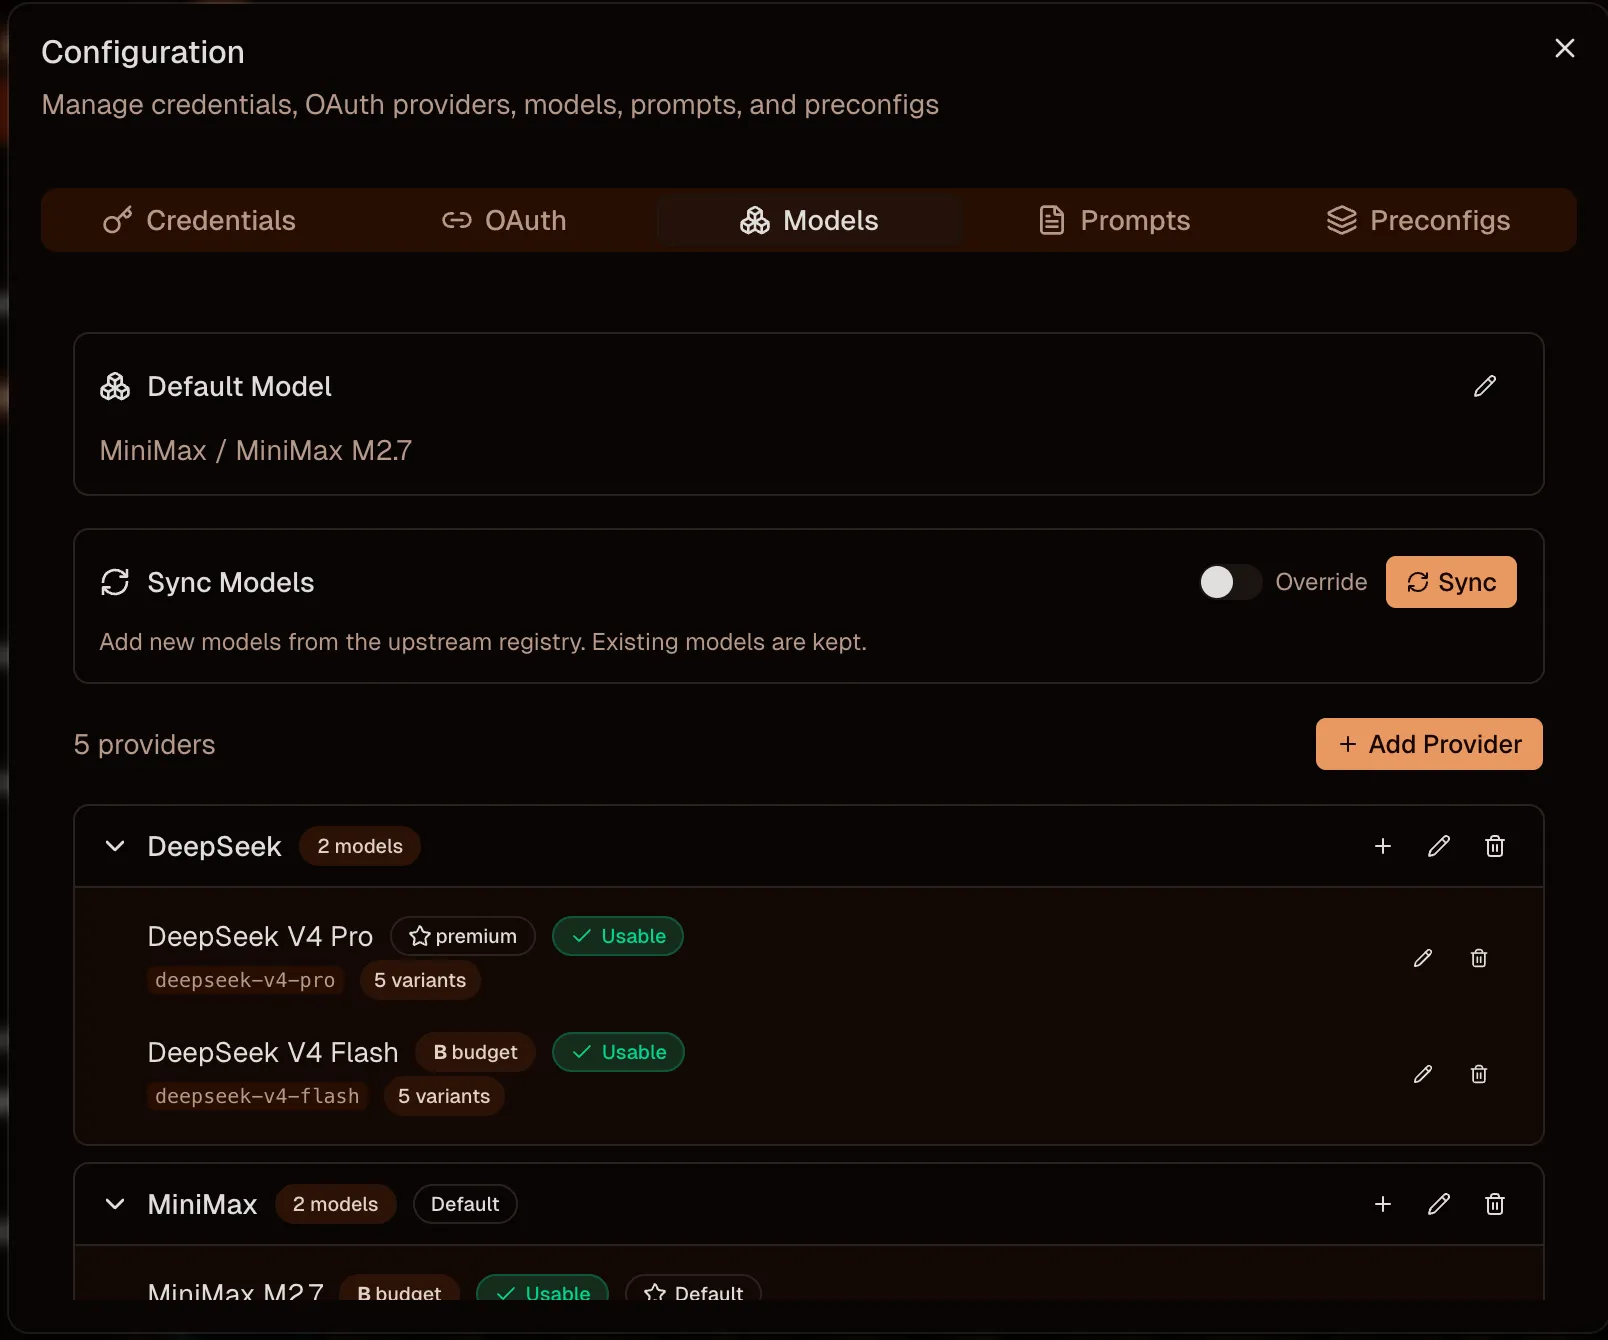
Click Sync Models to pull in the latest community list. You can preview changes or overwrite your local list. Use Add Provider to add a supported provider that is not yet configured, or Add Model to define a custom model for providers like OpenRouter that expose many models.
Edit a model
Click a model row to open the editor. You can change the Model ID (the identifier sent to the API), the Display Name (how it appears in your client), the context window size, and the max output tokens.

Assign a label like Budget or Premium to organize your models. Toggle capabilities on or off depending on what the model supports: text, images, video, PDFs. Some models are text-only, others can process multiple input types.
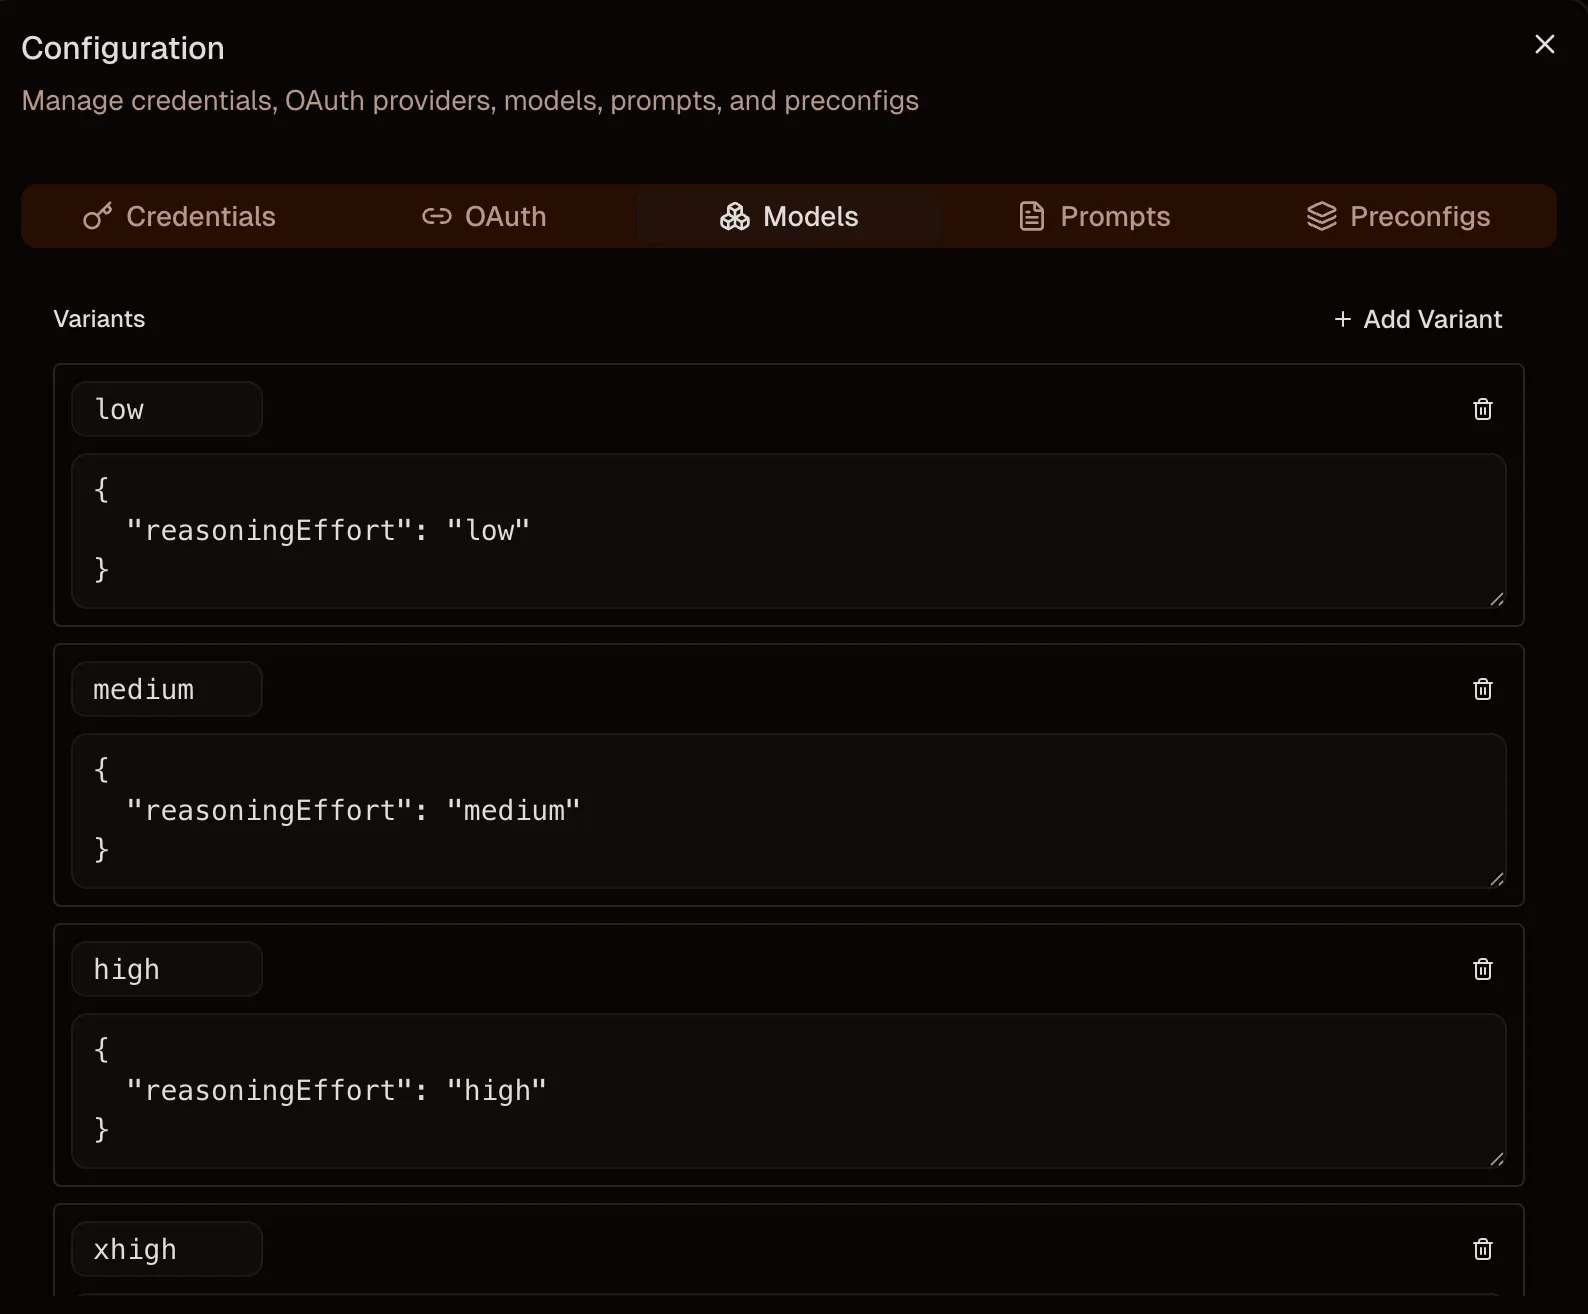
In the Variant section you can define different thinking levels for models that support it. These appear as options like High / Medium / Low effort when selecting the model in your client.